


Ball Valve Installation
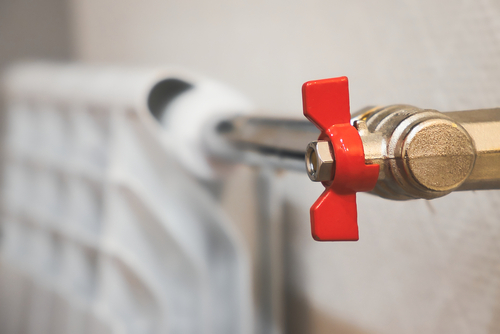
Figure 1: A ball valve with a butterfly handle on a plumbing line
Ball valves can be installed using various connection methods, such as threaded, glued-sleeve, and flanged connections. Proper ball valve installation helps prevent leaks in a building and proper media flow control. It is essential to consider the valve orientation and the type of ball valve selected to install it correctly. This article offers a step-by-step guide to ensure a secure and leak-free installation of manual two-way ball valves, commonly used in water lines. However, the same principles apply to all ball valves.
Table of contents
- Ball valve orientation
- Cutting and preparing pipes
- Installing a thread-type ball valve
- Glued sleeve connections
- Installing flanged ball valves
- Attaching output lines and testing
- FAQs
View our online selection of ball valves!
Ball valve orientation
2-way ball valves are generally bidirectional and can be installed in any direction. However, special ball valves, like v-port ball valves, have a single-direction flow. An arrow on the valve body indicates the direction. Do not install a ball valve upside down because dirt and sediment can accumulate on the stem packing. Whenever possible, install the ball valve with the stem facing upwards.
Cutting and preparing pipes
Use a pipe cutter to cut the pipes to the desired length. Use a deburring tool or sandpaper to remove any burrs or rough edges from the cut end of the pipe. Use a clean cloth to wipe the outside of the pipe and the inside of the valve socket or fitting. A poorly cut pipe with burs can lead to leaks or accumulate dirt.
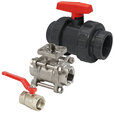
Installing a thread-type ball valve
A threaded ball valve has threaded ends that can easily connect to pipes or fittings.
Preparation
- Inspect threads: Check the pipe and valve threads for damage or debris. Clean them if necessary to ensure a smooth connection.
-
Apply sealant:
- Wrap Teflon tape around the male pipe threads. Use 2 to 3 wraps for optimal sealing.
- Wrap the tape in the same direction as the threads (clockwise when looking at the end of the pipe) to ensure it stays in place as you screw the valve onto the pipe.
- Alternatively, apply a suitable pipe thread sealant. Follow the manufacturer's instructions for application.
Initial threading
Begin threading the valve onto the pipe by hand to ensure proper alignment and avoid cross-threading. Ensure the valve and pipe are correctly aligned to prevent stress and potential leaks. Use a pipe support system to bear the weight of the valve and contents.
Tightening
In many cases, hand-tightening is sufficient for a secure connection. Alternatively, use an adjustable wrench to tighten the valve until it is secure and properly oriented. Be careful not to over-tighten because this can damage the threads or distort the valve’s internal components.

Figure 2: Threaded ball valve
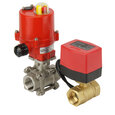
Glued sleeve connections
Glued sleeve connections involve joining pipes and valves using a solvent cement that chemically bonds the surfaces. This method is commonly used with PVC ball valves, providing a strong, leak-proof seal ideal for permanent installations.
Priming
Generously apply PVC primer to the outside of the pipe and the inside of the valve socket. This cleans and softens the surfaces for a strong bond. Allow it to dry for a few seconds.
Cementing
Quickly apply a uniform layer of PVC cement to the primed areas on the pipe and valve socket, ensuring complete coverage for a strong bond. Immediately insert the pipe into the valve socket with a slight twisting motion to evenly distribute the cement and provide a tight fit.
Holding and setting
- Manually hold the pipe and valve together for 30 seconds to 1 minute, or until the cement begins to set. This prevents the pipe from backing out of the socket.
- Apply gentle pressure to ensure the pipe remains fully inserted and aligned with the valve.
- Ensure the valve is correctly aligned with the piping system before the cement fully cures, as adjustments will be complex once the cement sets.
Curing
Let the joint cure for the time the cement manufacturer recommends, before applying pressure or using the system to ensure the bond is fully set.
Note: PVC primer and cement emit strong fumes, so working in a space with good ventilation is important.
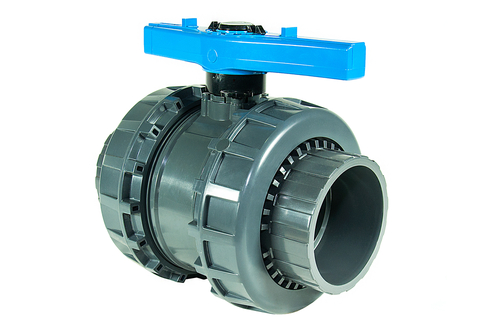
Figure 3: PVC ball valve
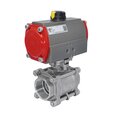
Installing flanged ball valves
Flanged ball valves have flanges on their ends, allowing them to be bolted to matching pipe flanges. This design is ideal for applications where easy in-line removal and maintenance are needed. The valve can be unbolted and removed without disturbing the surrounding piping system.
Preparation
Check for damage or debris on the flanges and valve surfaces, and clean them if necessary for a smooth connection. Choose the appropriate gasket material based on temperature, pressure, and chemical compatibility.
Aligning the valve
Align the flanged ends of the valve with the pipe flanges, ensuring correct orientation for flow direction. Place a gasket between each pair of flanges, ensuring it is centered for an even seal.
Bolting
Insert bolts through the aligned flange holes, ensuring they are the correct length and grade. Thread nuts onto the bolts and hand-tighten to hold the assembly in place.
Tightening
Tighten bolts in a crisscross pattern to evenly distribute pressure and prevent gasket deformation. Use a torque wrench to tighten bolts to the manufacturer’s specified torque to avoid over-tightening.
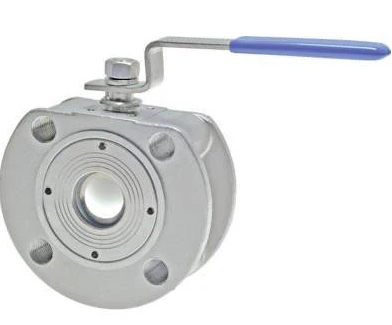
Figure 4: Flanged ball valve
Attaching output lines and testing
- Connect output lines: Connect the ball valve’s output port to the necessary equipment using additional pipes or fittings.
- Initial leak check: Gradually turn on the water supply and inspect all connections for leaks.
- Operate the valve: Slowly open the ball valve by turning the handle 90 degrees. The valve is closed when the handle is perpendicular to the pipe and open when parallel.
-
Address leaks:If leaks are detected, close the valve by turning the handle back to the closed position and retighten connections as needed.
- For flanged connections, re-tighten bolts or replace the gasket if necessary.
- Retighten the connections for threaded ball valves.
- For glued sleeve ball valves, if leaks are detected, ensure the joint is cured correctly and consider reapplying solvent cement if necessary.
- Final testing: Thoroughly test the system for leaks or loose connections to ensure proper installation and operation.
FAQs
Can a ball valve be installed upside down?
No, installing the stem upside down can lead to dirt and sediment buildup. The ideal installation position is with the stem facing upwards.
What are the considerations for ball valve vertical installation?
Ensure the valve is supported to avoid stress, check for proper flow direction, and confirm that the handle is accessible for operation.
div class="categories-container cta-tic">

