


Mounting With NAMUR Interface
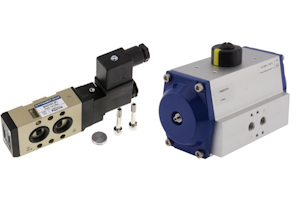
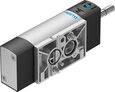
Figure 1: The NAMUR interface makes it simple to mount a NAMUR directional control valve to a pneumatic actuator.
The NAMUR interface for valve mounting is a standardized design that makes it simple to mount a NAMUR valve (Figure 1 left) to a pneumatic actuator (Figure 1 right). This standardization is crucial in ensuring compatibility and ease of installation across different manufacturers and types of equipment.
View our online selection of NAMUR products!
Mounting valves to actuators
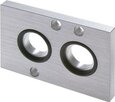
The NAMUR standard specifies the dimensions and hole patterns for mounting directional control valves to pneumatic actuators. Figure 2 shows the NAMUR hole patterns and dimensions of a NAMUR 1/4" interface. Figure 3 shows the NAMUR dimensions of the pneumatic actuator. Table 1 provides the same data along with the dimensions of a NAMUR 1/2" interface.

Figure 2: The dimensions and hole patterns on a NAMUR valve.
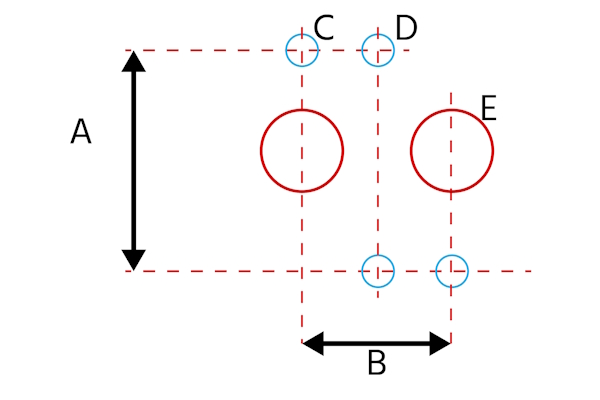
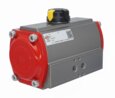
Figure 3: The NAMUR dimensions on a pneumatic actuator: height from top to bottom (A), width between two ports (B), hole for fastening screws (C), hole for installing a set screw onto the valve's rotary cylinder (D), and ports for compressed air (E).
Table 1: Dimensions of NAMUR interface (reference Figure 3)
| E | A | B | C | D | |
| NAMUR 1/4" | G1/8", G1/4" | 32 mm | 24 mm | M5 | M5 |
| NAMUR 1/2" | G3/8", G1/2" | 45 mm | 40 mm | M6 | M6 |
How to mount a NAMUR valve onto an actuator
The following steps describe the typical procedure for mounting a NAMUR valve onto a pneumatic actuator. Always read manufacturer instructions first, however, to learn if other specific steps are necessary.
- Safety first
- Prepare the actuator: Clean the surface around the NAMUR interface on the actuator. Ensure the pre-drilled holes are free of debris such as oil and dust.
- Inspect the valve: Check that the O-rings are in place around the valve's air ports.
- Align the valve: Position the valve's NAMUR interface in alignment with the interface on the actuator. The mounting holes and air ports must align.
- Insert mounting screws: Insert mounting screws through the valve and into the actuator's threaded holes. Hand tighten the screws to hold the valve in place.
- Tighten screws: If a torque specification is provided, use a torque wrench to tighten the screws to the recommended value. Typically, values are 5-7 Nm for M5 screws and 8-10 Nm for M6 screws.
- Check sealing: Ensure there are no gaps between the valve and the actuator.
- Connect pneumatic lines: Connect pneumatic air supply to the appropriate ports on the valve.
- Electrical connections: Connect electrical wires to the solenoid terminals.
- Test: Gradually pressurize the pneumatic system and check for any leaks around the valve and actuator interface. Operate the valve to make sure it correctly controls the actuator.
FAQs
What is a NAMUR solenoid valve?
A NAMUR solenoid valve is a type of valve designed to be mounted on pneumatic actuators using the standardized NAMUR interface for easy installation and compatibility.
How does a NAMUR interface work?
A NAMUR interface standardizes the mounting of solenoid valves to pneumatic actuators, ensuring compatibility and simplifying installation across different manufacturers.
Why is the NAMUR interface important?
The NAMUR interface is crucial for ensuring compatibility and ease of installation across different manufacturers and types of equipment, making maintenance and replacements straightforward.
Can any solenoid valve be used with a NAMUR interface?
No, only solenoid valves designed with the NAMUR interface can be mounted on pneumatic actuators using this standardized design.

