


Limit Switch Maintenance
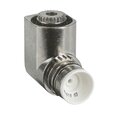
Figure 1: A limit switch can get corroded over time
Testing and maintaining limit switches is crucial in ensuring the proper operation of various industrial and household appliances. Over time, the contacts inside these switches can wear out or get dirty, causing them to malfunction. A faulty limit switch can lead to dangerous overheating conditions or other system failures. This article provides a guide on troubleshooting a limit switch using a multimeter and addressing common issues with a furnace limit switch.
Table of contents
- Faulty limit switch consequences
- How to test a limit switch with a multimeter
- Troubleshooting a furnace limit switch
- FAQs
View our online selection of limit switches!

Faulty limit switch consequences
A limit switch is an electromechanical device used to control machinery as part of a control system. It is designed to detect the presence or absence of an object or monitor the parts' position during machine operation. If a limit switch goes bad, several issues can arise depending on the role it plays in the system and the type of failure it experiences. Here are some potential consequences:
- Machine operation failure: A faulty limit switch may not stop machinery at the correct position, potentially causing overtravel and mechanical damage.
- Safety hazard: If a limit switch fails in a safety application, it could lead to dangerous situations where the machine operates when it shouldn't, risking injury or damage.
- Product quality issues: A malfunctioning limit switch can result in manufacturing errors, leading to products that don't meet quality standards.
- System error signals: Systems may detect a faulty limit switch and respond by displaying errors, entering a fault mode, or shutting down to prevent further issues.
- Increased downtime and maintenance costs: Replacing a bad limit switch can cause machine downtime and incur additional maintenance expenses.
- Unpredictable behavior: A failing limit switch might work intermittently, leading to inconsistent and unreliable machine operation.
A limit switch can break down due to general wear and tear, dirt buildup, corrosion, mechanical damage (if it is hit by something or accidentally dropped), or electrical issues like power surges.
To address a bad limit switch, it is important to:
- Diagnose the problem: Determine whether the issue is with the switch itself (e.g., a mechanical failure, a broken actuator, or an electrical issue) or with the wiring and connections.
- Replace the switch: If the switch is determined to be faulty, it should be replaced with a new one that matches the specifications required for the application.
- Test the system: After replacing the switch, the system should be tested to ensure that it is functioning correctly and safely.
How to test a limit switch with a multimeter
It's crucial to test a limit switch with a multimeter on several occasions:
- Diagnostics: Use a multimeter to identify problems when a limit switch is not working correctly.
- Pre-installation check: Verify that the switch is functioning before installing it.
- Calibration: Test the switch to ensure its accuracy and prevent future issues.
- Preventative maintenance: Regularly test the switch as part of maintenance to avoid unexpected failures.
Materials required
- Multimeter
- Jumper wires (Use standard electrical wires if jumper wires are unavailable)
Testing process
- Inspect the limit switch: Before testing, examine the limit switch for any signs of physical damage, such as cracks or corrosion, and ensure it's free from dirt or debris. Clean the switch with a soft cloth if necessary, avoiding abrasive chemicals.
- Set the multimeter to test the resistance: Turn the multimeter knob and set it to measure resistance, indicated by the ohm symbol. Connect the black lead to the common (COM) terminal and the red to the VΩmA terminal. Attach the leads to the limit switch terminals. A functioning switch will show a beep or a near-zero reading.
- Switch to AC voltage testing if needed: Change the multimeter setting to AC voltage if the resistance test doesn't provide clear results. An operational switch will show a voltage reading, while no voltage indicates a potential fault. Avoid using the switch until it has been serviced or replaced if it's found to be defective.
- Adjust the multimeter to DC voltage: If no results come from the AC voltage test, switch the multimeter to DC voltage to test the limit switch. A reading of 0 volts indicates a working switch, while any voltage reading suggests it needs replacement.
-
Test the continuity: Set the multimeter to continuity to test the switch's ability to complete an electrical circuit. Touch the probes to the terminals with the limit switch in the closed position.
- A beep sound in a normally closed (NC) switch confirms the switch works fine, while no beep means the switch is malfunctioning and should be replaced.
- A normally open (NO) switch does not have a complete closed circuit in its default state; hence it will not produce a beep sound during the continuity test.
- Manual testing: If a multimeter is unavailable, use a jumper wire to test the limit switch. Connect one end to the power source's positive terminal and the other to the limit switch's normally open terminal. If the switch works, the power source will get activated.
- Make necessary adjustments: If the switch shows proper continuity and there are no signs of physical damage, but it's not activating at the correct times, it likely just needs adjustment. For example, the limit switch may not be properly aligned with the actuator or the part it is supposed to detect. If the limit switch requires realignment, power down the device, remove the cover, and adjust the switch. After realignment, power up and retest to ensure proper operation.
-
Replace the limit switch: If the switch fails the continuity test, shows signs of physical damage, or continues to operate inconsistently after cleaning and adjusting, it's time to replace it. For this, turn off the power, remove the screws and wires, and replace the switch. Reattach the wires, test the new switch, and if issues continue, consider professional help.
- Note: Be cautious when testing with the multimeter to avoid electric shock; do not touch the probes directly. Also, handle the limit switch gently to prevent damage.
Example: troubleshooting a furnace limit switch
A furnace limit switch (or high limit switch) turns off the heater if the temperatures rise above a safe level, preventing damage. It keeps the furnace from operating in unsafe conditions, such as overloads or short circuits.
How to test a furnace limit switch
To check a limit switch in a furnace, turn it on and let it heat up to the set temperature. Next, turn the temperature dial all the way down and wait for 3 - 5 seconds. Listen for a click, which means the limit switch is working. The activation of the limit switch should turn off the burners or heating element, as it's responding to the signal that the space no longer needs heat.
Burnout test
The test involves using a specialized testing device to simulate an over-temperature condition, which should trigger the limit switch to open the circuit and shut down the furnace.
- Connect the tester: Attach the furnace limit switch tester according to the manufacturer's instructions. This device simulates the conditions that cause the limit switch to operate.
- Perform the burnout test: Activate the tester to simulate an over-temperature condition. The limit switch should respond by opening the circuit and shutting down the furnace to prevent damage.
- Observe the results: If the limit switch operates as expected during the simulation, it functions correctly. If it fails to respond, the switch may need adjustment or replacement.
Additional testing and troubleshooting
- Check for air leaks: Inspect the plenum (a part of the ductwork that serves either as a distribution area for heated or cooled air or as a return area for air to be re-heated or re-cooled) and vacuum lines connected to the limit switches for any air leaks, as this can affect the operation of the switch.
- Continuous blower operation: If the blower runs continuously, it may indicate a problem with the limit switch. However, verify that the thermostat settings are correct before concluding there is a switch issue.
Disconnect the limit switch and use a multimeter to check for continuity across the limit switch terminals; replace the switch if it fails.
FAQs
How do I know if my limit switch is bad?
Check for inconsistent operation, failure to activate/deactivate, or physical damage. Test continuity with a multimeter; a lack of continuity indicates a bad limit switch.
What causes a high limit switch to trip?
A high limit switch trips due to overheating from restricted airflow, dirty filters, or blower issues.
How to fix an open high limit switch?
To fix an open high limit switch: replace dirty filters, clear blocked vents, ensure proper blower function, or reset manually if applicable.
How to reset a furnace limit switch?
Turn off power to the furnace, locate the limit switch, press the reset button or turn the lever on the switch, and restore power.

