


HVAC Temperature Switch Guide
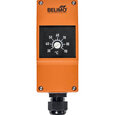
Figure 1: HVAC temperature switch
A temperature switch in an HVAC system serves as a critical control component, ensuring the system operates within safe and efficient temperature ranges. By monitoring and responding to temperature changes, these switches help prevent overheating or freezing, which can lead to equipment damage, inefficiency, and increased energy costs. Additionally, they play a vital role in maintaining a comfortable and safe environment for occupants by automatically adjusting the HVAC operations based on the temperature needs of the space. This proactive approach to temperature management not only extends the lifespan of the HVAC equipment but also enhances safety by preventing conditions that could lead to fires or other hazards. This article discusses the working, installation methods, and wiring of HVAC temperature switches.
Table of contents
- How an HVAC temperature switch works
- Where is a temperature switch installed
- How to install temperature switch
- Selection criteria
- How to test a temperature switch
- FAQs
View our online selection of HVAC temperature switches!
How an HVAC temperature switch works
The temperature switch has a capillary tube, which is a slender copper pipe that connects the temperature-sensing component with the switch mechanism. When the temperature hits a predetermined limit, the device triggers its single pole double throw (SPDT) switch, causing it to engage and lock into place mechanically. This action is a safety feature designed to respond to specific temperature conditions.
In the event of a capillary tube leak, the system is designed to react by creating a continuous electrical connection (discussed further down in the article). This serves as an alert to a malfunction in the temperature sensing, indicating that the device can no longer accurately detect or respond to temperature changes. Despite this, the device incorporates a feature that allows for the manual resetting of the switch. This means that if the temperature falls back below the preset limit, the switch can be manually unlocked, allowing the device to resume its function of monitoring and responding to temperature variations. This design ensures that the temperature switch remains both sensitive to changes in temperature and capable of indicating when a fault occurs.
The primary roles of a temperature switch, or limiter are:
- Temperature regulation: The primary purpose of a temperature switch in HVAC systems is to maintain the desired temperature within a space. This is achieved by switching heating or cooling devices on or off, or by modulating their output, to maintain the setpoint temperature.
- Safety: Temperature switches play a critical role in preventing overheating or overcooling, which can lead to equipment damage. For instance, a temperature limit switch will shut off the system or trigger an alarm if temperatures exceed safe limits.
- Energy efficiency: By ensuring that HVAC systems operate only when necessary to maintain the desired temperature, temperature switches help in reducing energy consumption and, consequently, energy costs.
Where is a temperature switch installed
In an HVAC system, a temperature switch can be installed in several key locations, depending on the specific function it needs to perform.
- Air supply ducts: To regulate or monitor the temperature of the air being supplied to space.
- Return air ducts: To sense the temperature of the air being pulled back into the HVAC system for adjustments.
- Evaporator coils: An HVAC evaporator temperature switch prevents coils from freezing by monitoring the coil temperature and adjusting the refrigeration cycle.
- Furnaces: Temperature limit switches in furnaces prevent overheating by shutting down the furnace if internal temperatures get too high.
How to install temperature switch
Note: The exact installation process may vary slightly with the manufacturer or temperature switch design. This section explains how to install a Belimo temperature switch.
Installing the temperature switch involves a few steps:
- Preparation: Begin by removing the four screws on the front of the device and attaching the cable gland at the bottom.
-
Wiring:Route the cable through the gland and connect the wires according to the wiring diagram, ensuring proper insulation. If the capillary leaks, the electrical circuit between terminals 1 and 4 is permanently closed, and unlocking the device is no longer possible. The various terminals are:
- Ground terminal: Provides a safety connection to earth.
- Terminal 1 (NC): Normally closed, allowing current flow in the device's default state; opens when activated.
- Terminal 2 (Common): Serves as the pivot point in the switch, directing current flow to either the NC or NO terminal based on the device's state.
- Terminal 4 (NO): Normally open, blocking current flow in the device's default state; closes and allows current when activated.
- Reassembly: Secure the front cover back in place with the screws.
Figure 2: Belimo temperature switch wiring diagram: NC (1), common (2), and NO (4).
Mounting mechanisms
Industrial temperature switches can be mounted in several ways, including direct pipe contact, thermal mounting, and wall mounting with or without an immersion sleeve, providing flexibility for various installation scenarios.
Pipe contact mounting
- Method: Attaching the temperature switch directly to the pipe's exterior using a mounting bracket or band.
- Ideal use: Monitoring water temperature in pipes.
- Key consideration: Ensures accurate temperature measurement by maintaining good thermal contact, possibly using thermal conductive paste and ensuring a clean, insulation-free mounting surface.
Figure 3: Pipe contact mounting
Thermowell mounting
- Method: Inserting the temperature switch into a thermowell that is mounted into the process stream.
- Ideal use: Suitable for harsh or pressurized environments where direct contact with the process medium is not advisable.
- Key consideration: Ensures the temperature switch can be removed and serviced without interrupting the process or draining the system. It's important to select a thermowell of compatible material and size for the specific application to ensure accurate temperature measurement and system integrity.
Figure 4: Thermowell mounting
Wall mounting with probe in flange
- Method: Mounting the temperature switch on a wall or panel, with the probe extending into the process medium through a flange.
- Ideal use: Useful for tanks or large pipes where monitoring the temperature at a specific depth or location within the medium is required.
- Key consideration: The flange is typically bolted to a mating flange on a tank, pipe, or duct, with the probe passing through a gasket between the flanges to ensure a leak-proof seal. It's crucial to select a probe of sufficient length to reach the medium being measured, ensuring accurate and effective temperature monitoring.
Figure 5: Wall mounting with probe in flange
Wall mounting with probe in immersion sleeve
- Method: Similar to flange mounting, this approach involves inserting the probe into an immersion sleeve (or thermowell) that is mounted on the wall or directly in the process medium.
- Ideal use: Perfect for applications where the temperature sensor needs protection from the process medium or requires isolation for maintenance and replacement purposes.
- Key consideration: The immersion sleeve is secured to the wall or vessel, with the probe inserted into the sleeve to protect it. It's important to consider the immersion depth of the probe to ensure accurate temperature measurement. This setup not only safeguards the probe but also facilitates easy removal or replacement without disrupting the process.
Figure 6: Wall mounting with probe in immersion sleeve
Selection criteria
When selecting a temperature switch for an HVAC system, understanding the key features and specifications is crucial to making an informed decision.
- Temperature measuring range: Consider the temperature range the switch can monitor. Ensure it aligns with the operational temperature range of the specific application, whether it's for heating water systems, warm water systems, or other HVAC applications.
- Degree of protection (IP Rating): The IP rating indicates the level of protection against dust and water ingress. Select a temperature control switch with an appropriate IP rating to ensure durability and reliable operation in the intended environment, especially if exposed to moisture or particulate matter.
- Electrical connection: Consider the type of electrical connection and terminals provided. Ensure compatibility with the system's wiring and electrical requirements for a seamless installation and operation.
- Operating voltage: Check the operating voltage range of the temperature switch, including AC and DC voltage compatibility. It's essential to match the switch's voltage requirements with the system's operating voltage to avoid electrical mismatches and ensure safety.
- Output signal and contacts: Understand the type of output signal (e.g., changeover (SPDT) output) and the number of contacts. This affects how the switch interacts with the HVAC system, including how it opens or closes electrical circuits in response to temperature changes. Ensure the switch's output signal and contact configuration meet the system's control needs.
- Mounting options: Evaluate the available mounting types (e.g., pipe contact mounting, thermowell mounting, wall mounting). The mounting flexibility can significantly impact the ease of installation and the effectiveness of temperature monitoring in the specific application.
- Switching function: Familiarize with the switch's operation, particularly how it responds to temperature changes. A switch that automatically resets to its original position upon cooling or heating to a specific setpoint offers convenience and reliability in maintaining desired temperature conditions.
- Minimum switching current: Consider the minimum switching current specification. This ensures the switch can reliably operate with the system's current levels, especially in low-current applications.
How to test a temperature switch
Testing an HVAC temperature switch is crucial to ensure it operates correctly and responds to temperature changes as expected. Here's a step-by-step guide on how to test a temperature switch:
- Disconnect power: Before beginning, ensure that power to the HVAC system is turned off to prevent any electrical hazards.
- Access the temperature switch: Locate and gain access to the temperature switch. This may involve removing panels or covers on the HVAC unit.
- Set multimeter: Set the multimeter to the continuity setting. This setting is often represented by a sound wave or diode symbol on the multimeter.
- Connect multimeter probes: Attach one probe of the multimeter to one terminal of the temperature switch and the other probe to the opposite terminal. It doesn't matter which probe goes on which terminal since you're checking for continuity.
- Check for continuity: With the probes in place, check the multimeter reading. A functioning temperature switch should show continuity (often indicated by a beep sound from the multimeter or a specific reading) at room temperature if it's normally closed (NC).
- Apply heat: Carefully apply heat to the temperature sensor using a heat source like a hair dryer or heat gun. Monitor the switch; it should open (breaking continuity) once the temperature exceeds its set threshold. If the switch is normally open (NO), it should close (indicating continuity) when heated past its activation point.
- Cool down: Allow the temperature switch to cool down. Observe if it returns to its original state (continuity for NC switches, no continuity for NO switches) once it reaches below the threshold temperature.
- Evaluate results: If the switch does not respond as described above, it may be faulty and require replacement. A properly functioning temperature switch will show clear changes in continuity as it responds to temperature changes.
FAQs
How to calibrate a temperature switch?
Most temperature switches are factory-calibrated. If recalibration is needed, refer to the manufacturer's instructions or use a calibrated thermometer for comparison adjustments.
How does an infrared temperature switch work in HVAC systems?
It detects temperature changes from a distance by measuring infrared radiation emitted by objects, triggering HVAC adjustments.
How to adjust a temperature switch?
Turn the dial or screw on the switch to set the desired activation temperature.
