


Humidifier Solenoid Valve
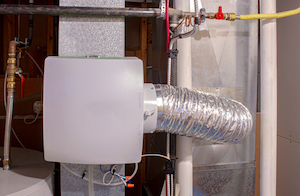
Figure 1: Residential humidifier
A humidifier raises the humidity of a space, ranging from a single room to an entire building. This device is particularly convenient to combat dryness, benefiting people with dry skin and relieving respiratory issues. A solenoid valve is an electrically actuated valve that controls water flow to the humidifier. This article discusses how to select a solenoid valve for a humidifier, the possible reasons for the valve failure, and how to replace the solenoid valve.
Table of contents
- Humidifier working principle
- How to select a solenoid valve for a humidifier
- Humidifier solenoid valve replacement
- How to install a solenoid valve to a humidifier
- FAQs
View our online selection of solenoid valves!
Humidifier working principle
A humidifier increases the moisture content of air by releasing water vapor or steam in a closed atmosphere. Low atmospheric humidity can cause various health and structural issues in buildings. The common elements of a humidifier are the following:
- Reservoir: The reservoir is a tank that provides the water necessary to create the moisture output. It is filled between operation cycles.
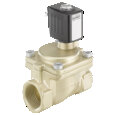
- Humidifier solenoid valve: The solenoid valve in a humidifier system controls the water flow from the reservoir to the evaporator system. Water is not fed into the evaporator constantly. The valve remains closed until the atmospheric humidity drops below a set level.
- Humidistat: A humidistat is a sensor that reacts to ambient atmospheric humidity levels. It sends electrical signals to turn on the solenoid valve if the humidity level is below a set point (adjusted manually). Conversely, the humidistat sends signals to the solenoid valve to stop the water supply to the evaporator once the set humidity level is attained.
- Evaporator mechanism: The evaporator releases the water channeled by the solenoid valve into the atmosphere in the form of fine droplets that become suspended in the air, raising the humidity.
How to select a solenoid valve for a humidifier
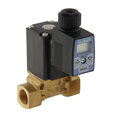
A solenoid valve in a humidifier carries water. Therefore, choose a housing material and seal compatible with water, such as brass and EPDM, respectively. To properly select a solenoid valve for a humidifier, it is important to consider the valve's material selection, voltage, and if a filter is needed. Use the following parameters as guidance while selecting a solenoid valve for a humidifier:
- Housing material: Brass is a common solenoid valve housing material compatible with water applications. See our housing material article for additional information.
- Seal material: EPDM is a common solenoid valve seal material compatible with water applications. See our seal material article for additional information.
- Voltage: 24V AC is common, but verify the input voltage from the humidifier unit to the solenoid valve.
- Strainer: The humidifier works effectively with cold, hot, hard, or mechanically softened water. However, solenoid valves are sensitive to dirt and may get clogged if the water is not clean. A separate strainer with the valve is advisable if it doesn't come with an in-line strainer. Ensure that the material from which the strainer's filter is made is compatible with water. Read our article on the working of a strainer to get more information.
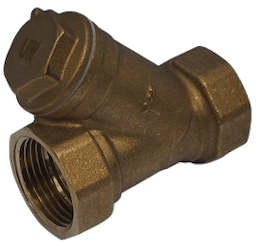
Figure 2: A Y-shaped strainer
Humidifier solenoid valve replacement
A humidifier does not work without water. If the water source is on and no water reaches the humidifier's reservoir, the problem may lie with the solenoid valve. This section covers the following:
- Testing whether the issue is the solenoid valve or the humidistat
- Common issues with solenoid valves in humidifier systems
- How to install a solenoid valve in a humidifier system
How to check a faulty solenoid valve in a humidifier
A multimeter can detect the exact cause of the fault. To verify if the voltage and the connection between the solenoid valve and humidistat are working, follow these steps:
- Set the multimeter to measure voltage. As the solenoid is powered with 24V AC, select the next range higher on the multimeter.
- Turn off the humidistat or set it to a very low value.
- Connect one probe of the multimeter to one of the wiring connections between the humidistat and the solenoid and the other probe to the second wiring connection between the humidistat and the solenoid.
- The multimeter should not register any voltage.
- Turn the humidistat to a very high setting, such as 80% relative humidity, or until the device creates a ‘click’ sound.
- Measure the voltage across the solenoid wires using the multimeter.
- If the humidistat is performing well, the multimeter reads 24V, so the solenoid valve may be defective. If the multimeter doesn't register any voltage, the humidistat is faulty and needs to be repaired or replaced.
- If the humidistat is functioning, the solenoid valve is likely the issue. Read our article on how to test a humidifier solenoid valve with a multimeter.
Humidifier solenoid valve potential issues
- Humidifier solenoid valve clogged: Dirt or other contaminants may become lodged in the valve seat, preventing the valve from closing and opening correctly. If the humidifier valve is stuck or not opening, clean the valve thoroughly to remove any dirt, or use a filter with the valve to remove the impurities. Read our article on cleaning humidifier solenoid valves.
- Excessive differential pressure: Excessive differential pressure between the input and output ports of the solenoid valve can cause the valve's internal components to clatter during operation. Adjust the fluid pressure accordingly.
- Leaking valve: If the humidifier solenoid valve leaks, the solenoid is partially open or stuck open. This can happen due to cracks in the plunger valve seat, internal dirt buildup, or degraded O-rings. Replace the valve if it leaks.
- Other structural and operational issues: Corrosion, burnt-out coils, and improper valve opening and closing may be caused by improper voltages and electrical faults. Always use the voltage recommended by the manufacturer of the humidifier and the valve.
Read more in our solenoid valve troubleshooting article.
How to install a solenoid valve to a humidifier
To correctly install a humidifier solenoid valve, perform the following steps:
- Turn off the water tap that supplies water to the humidifier unit and switch off the power supply. If unsure how to switch off power, read our article on how to read a circuit breaker panel.
- Position the solenoid valve (Figure 3 labeled B) carefully by aligning the threaded union solenoid ports with their matching union nuts on the water lines.
- If the water lines are tubes or hoses instead of pipes, ensure that the connection between the solenoid valve and tube or hose is made with a fitting or with a hose barb and hose clamp. Read our article on tubes and hoses to get more information.
- Wrap the male threads of the valve union body with sealing tape and carefully position the water inlet (Figure 3 labeled C) into the solenoid valve, and secure the compression nut smoothly.
- Fix the water feed tube (outlet) to the solenoid valve (Figure 3 labeled A) and fasten the pipe to the humidifier using a compression nut.
- Turn on the water supply and check for leaks at the water inlet.
- Make electrical connections to the solenoid valve wires (Figure 3 labeled D).
- Typical humidifier solenoid valve wiring has three wires for phase, neutral, and earth connections.
- Check the solenoid valve’s manual to know the details regarding which of the three wires correspond to phase, neutral, and ground based on their color-coding.
- As the valve is electrically powered by the humidistat output, connect the phase and neutral wires to the corresponding wires coming out of the humidistat.
- Ensure to connect the third wire to the earth to protect from electrical hazards.
- Once the solenoid valve is successfully positioned, test the installation.
- Turn on the humidistat to around 80 percent, or until it produces a ‘click’ sound. This initiates the valve to open and, in turn, run water into the humidifier.
- Wait for 1-2 minutes and check the humidifier drain to confirm whether the water flows through the humidifier.
- Water dripping out of the drain or the humidifier drain pipe end signifies that the installation is successful.
- Check for any leaks in the water inlet/outlet at this stage, and fix the connections accordingly.
.jpg)
Figure 3: Installation of the solenoid valve to a humidifier: water inlet (A), solenoid valve (B), solenoid valve wires (C), and water feed tube (D).
FAQs
How do I know if my humidifier solenoid is bad?
Turn the humidistat from high to low. This should send signals to the solenoid valve to open or close. There should be a clicking sound.
How to repair a humidifier solenoid valve?
In the case of a faulty solenoid valve on a humidifier, it likely needs to be replaced to return normal function to the humidifier system.
How does a humidifier solenoid valve work?
The humidistat on the humidifier monitors the humidity in a space. If the humidity is below the set level, the humidistat signals the valve to open. When the humidity is high enough, the humidistat signals the valve to close.


