


Replace an HVAC Pressure Switch
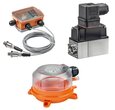
Figure 1: A pressure switch (top right of image) is typically installed near the draft inducer motor.
Replacing a pressure switch in a furnace or an A/C condenser requires a step-by-step approach. Each phase is crucial, from identifying the correct pressure switch compatible with the system to the detailed steps involved in safely removing the old switch and installing a new one. Whether addressing issues with a furnace or an A/C unit, this guide offers the knowledge and confidence to complete the replacement process, emphasizing safety, accuracy, and compliance with legal standards.
Table of contents
View our online selection of hvac pressure switches!
Replace furnace pressure switch
Replacing a pressure switch in a furnace is a task that requires attention to detail and safety precautions. Pressure switches need to be replaced if they are faulty. Read our article on testing pressure switches with multimeters to learn how to diagnose pressure switches in HVAC systems. Follow this step-by-step guide to ensure a successful replacement.
- Find the right pressure switch: The replacement pressure switch must be specific to the furnace model. Check the manufacturer's specifications to ensure compatibility. Verify that the new pressure switch has the same ratings (pressure settings and electrical ratings) as the old one to ensure proper operation.
- Turn off electricity and gas: Before starting, ensure the electricity and gas supply to the furnace are turned off to prevent accidents.
- Locate the pressure switch: Locate and remove the access panel on the furnace to gain access to the internal components. The pressure switch is typically found near the draft inducer fan motor.
- Disconnect power wires and vacuum tubes: Carefully disconnect the power wires connected to the pressure switch. Remember or label the connections for easy reassembly. Then, remove the vacuum tubes attached to the pressure switch. Handle them gently to avoid damage.
- Unscrew and remove pressure switch: Use the appropriate tool (e.g., a screwdriver) to unscrew and free the pressure switch from its mounting. Then, remove the old pressure switch from its position.
- Install new pressure switch: Place the new pressure switch where the old one was. Secure the new pressure switch by screwing it into place. Ensure it is firmly attached, but avoid over-tightening.
- Attach vacuum tubes and power wires: Reconnect the tubes to the new pressure switch. Reconnect the power wires and refer to notes or labels to ensure correct connections.
- Replace access panel: Once all connections are secure, replace the furnace's access panel.
- Turn on electricity and gas: Restore the furnace's electricity and gas supply. Ensure all other furnace settings are the same before starting the replacement.
- Test pressure switch: Follow the manufacturer's instructions to test the new pressure switch and ensure it operates correctly. This may involve observing the furnace through a complete heating cycle.
Replace A/C pressure switch
Before attempting to replace an A/C pressure switch, there are two essential tasks:
- Determine if refrigerant recovery is necessary
- Determine which pressure switch needs to be replaced. It's normal for an HVAC A/C condenser to have a low-pressure and high-pressure switch.
Refrigerant recovery
In many places, it is illegal to release refrigerant into the atmosphere. Therefore, it's necessary to recover refrigerant using a commercial device. A professional may be required to do this step. So first, determine whether or not the pressure switch connectors have Schrader valves inside of them, meaning the refrigerant won't leak from the connector points and does not need to be recovered ahead of time. If recovery is necessary, the following is a brief overview of the steps involved:
- Safety precautions: Wear protective gear and work in a well-ventilated area.
- Prepare equipment: Gather a refrigerant recovery machine, recovery tank, and necessary hoses. Ensure the recovery tank is empty and appropriate for the refrigerant type.
- Setup: Connect the recovery machine between the HVAC system's low-pressure port and the recovery tank. Open necessary valves.
- Recover refrigerant: Turn on the recovery machine to transfer refrigerant from the HVAC system to the recovery tank. Monitor the process through pressure gauges until complete.
- Shutdown and disconnect: Once recovery is complete, turn off the machine, close valves, and disconnect hoses.
- Store and document: Properly label and store the recovered refrigerant. Record the recovery details for compliance.
Faulty low-pressure switch indicators
The following symptoms may indicate an issue with the low-pressure switch:
- Frequent cycling or short cycling
- A/C system fails to start: A malfunctioning low-pressure switch might prevent the A/C system from starting because it falsely detects that the refrigerant pressure is too low for the compressor to safely operate.
- Freezing over: If the evaporator coil or other parts of the A/C system start freezing over, it could be due to the system operating at too low of a pressure, suggesting the low-pressure switch isn't functioning correctly.
- Insufficient cooling: When the low-pressure switch fails, it can cause the system to operate inefficiently, resulting in poor cooling performance.
Faulty high-pressure switch indicators
The following symptoms may indicate an issue with the high-pressure switch:
- A/C system shutdown: The high-pressure switch is designed to shut down the system if the refrigerant pressure becomes too high, to prevent damage. If the A/C system abruptly shuts down, especially on hot days or when it's working hard, it might be due to a high-pressure switch issue.
- A/C system fails to start: Similar to the low-pressure switch, a malfunctioning high-pressure switch can prevent the system from starting, as it may incorrectly sense that the refrigerant pressure is too high.
- Reduced cooling efficiency: While less direct than with low-pressure issues, high-pressure problems can also lead to reduced cooling efficiency. This is because the system is not operating within its optimal pressure range, potentially causing the compressor to work harder than necessary.
- Noise from the compressor: If the pressure gets too high, it can cause the compressor to make noise due to the strain. Although this can be caused by various issues, a failing high-pressure switch is one potential culprit.
Figure 2: A high-pressure switch on an A/C compressor block.
Replacement procedure
- Safety first: Turn off the power to the HVAC unit and wear PPE, e.g., safety goggles and gloves.
- Access the pressure switch: The access panel on the condenser unit is usually on the side or bottom of the unit. Use a screwdriver to remove the screws holding the panel in place.
- Identify and disconnect the faulty pressure switch
- The pressure switch will have electrical wires connected to it and a tube or hose that detects the pressure in the system.
- Use a multimeter to confirm the pressure switch is faulty by checking for continuity. If there's no continuity, the switch needs replacing.
- Take a photo or make a note of the wire connections on the pressure switch for reference when installing the new one.
- Carefully disconnect the electrical wires and the pressure tube/hose from the old switch.
- Install the new pressure switch
- Connect the pressure tube/hose to the new pressure switch.
- Reconnect the electrical wires to the new switch, referring to the photo or notes taken earlier to ensure correct wiring.
- Secure the new switch in place, if necessary, using the same mounting method as the old one.
- Test the system
- Replace the access panel and secure it with screws.
- Turn the power back on to the HVAC unit at the breaker panel.
- Test the system by lowering the thermostat to trigger the A/C to turn on. Listen for the condenser and fan to activate. The absence of error codes or unusual noises typically indicates a successful replacement.
FAQs
How to replace a pressure switch in an HVAC system?
To replace a pressure switch, first, turn off power, locate the switch, disconnect wires and tubing, then install the new switch and reconnect.
How to wire a new HVAC pressure switch?
After installing the pressure switch, connect the electrical wires to the designated terminals as per the wiring diagram provided with the switch.
What are the signs of a failing AC high pressure switch?
Signs include AC not cooling, compressor not engaging, or the system cycling on and off too frequently.
How to determine if your furnace pressure switch needs replacement?
Common indicators include the furnace not starting, an error code on the furnace’s LED display, or a clicking sound without ignition.
