


How To Replace A Ball Valve
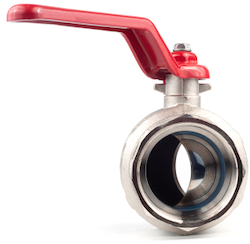
Figure 1: Ball valve
Ball valves are an integral part of plumbing and piping systems. These valves are highly durable and leak-resistant, but are not immune to damage. Replacing a damaged ball valve is relatively simple if the correct sequence of steps is followed. This article discusses replacing a manual ball valve connected to a copper or PVC pipe.
Table of contents
View our online selection of ball valves!
Ball valve issues
A ball valve is a shut-off valve that directs fluid flow using a rotary ball with a bored hole. Ball valves can fail in several ways, including getting stuck, leaking fluid, corroding, or overheating. These issues can prevent the valve from functioning properly. Typically, there are three cases:
- Ball valve issues that can be fixed manually: A ball valve can become stuck due to sediment and dirt buildup, making it difficult to open and close. Manual intervention can easily resolve actuator issues, as explained in our article on ball valve problems and troubleshooting.
- Ball valve issues that can be fixed by replacing a part: For issues such as a partially closing ball valve, or a worn-out O-ring and stem, it may be necessary to replace certain parts of the valve instead of ordering an entirely new one.
- Ball valve issues that require a total replacement: Certain issues, like a leaking ball valve, may require replacing the whole valve with a new one.
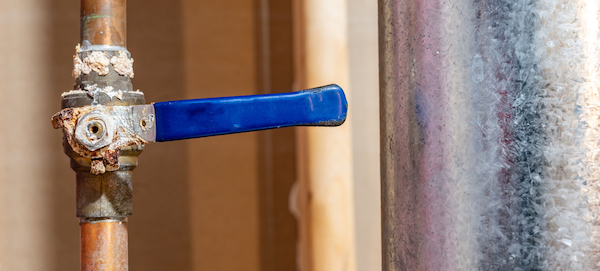
Figure 2: A rusted ball valve
How to replace a ball valve
The following is an example of replacing a ball valve on a water line. The same principles apply to other applications.
Step 1: Choose the new valve
It is simple to choose the new ball valve if the old valve will be replaced with an identical valve. If the valve needs to be replaced because it is not operating correctly, you should choose a new valve with different parameters. Read our ball valve selection criteria article to learn more about ball valve parameters. If a different valve may be necessary, start by reading our valve overview article to learn more about what type of valve may be useful.
Step 2: Turn off the water
Turn off the main water supply to all the pipes being worked on. Then, drain the existing water pressure in these pipes by turning on the connected faucet.
Step 3: Access the pipes
Accessing pipes to replace a ball valve depends on whether the pipes are exposed or located within a wall.
- Exposed: Commonly found in basements, utility rooms, or under sinks.
-
Concealed: Accessing these pipes requires more effort. Shut-off valves, such as ball valves, are usually visible or have an access panel because many local regulations require it. However, the pipes may still be behind walls which need to be opened up to access the pipes.
- Note: Stud finders and pipe detectors are available on the market, but we recommend seeking professional help unless you are certain of your skills.
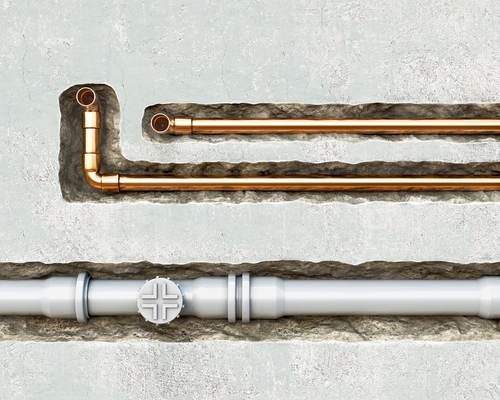
Figure 3: Three-dimensional representation of copper and PVC pipes within a wall
Step 4: Remove the old valve
Use two wrenches to remove a threaded valve if possible. Use a hacksaw or pipe cutter to cut off a welded, rusted, or otherwise stuck valve.
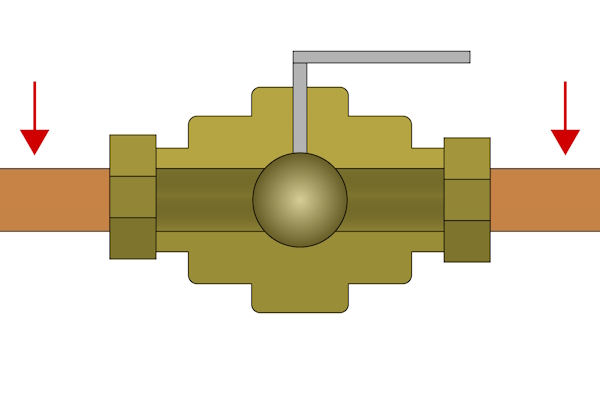
Figure 4: A ball valve connected in a pipe system. The red arrows show the points where the pipe needs to be cut to remove the valve.
Step 5: Disassemble the ball valve
If you want to try salvaging the ball valve by replacing a potentially faulty part instead of the entire valve, disassemble the valve and keep all the parts together. This ensures that if any of the individual parts are still good, the reassembling process can be done easily.
Ball valves, especially smaller ones, are cost-effective and not expensive to replace entirely. It is often simpler to replace the entire valve than an individual part. If it is beneficial to replace a single part, especially in larger, more expensive valves, use lubricating oil and screws to reassemble the ball valve parts after the replacement.
Step 6: Inspect the ball valve parts
Inspect the ball valve parts for any cracks or wear and tear that might have led to the leaking or nonfunctional ball valve. Read our ball valve leakage troubleshooting article for more details on the causes of ball valve leakage and how to troubleshoot them.
Step 7: Install the new/repaired ball valve
When installing a ball valve onto a PVC or copper pipe, consider the specific requirements and techniques for each material, as well as the type of connection the valve uses.
Installing a ball valve on PVC pipe
- Preparation: Ensure the PVC pipe is clean and free from debris. Cut the pipe to the desired length using a PVC cutter for a clean edge.
-
Connection type: For PVC, ball valves typically use glued sleeve or threaded connections.
- Glued sleeve: Apply PVC primer and cement to the outside of the pipe and the inside of the valve socket. Quickly insert the pipe into the valve socket and hold it in place until the cement sets.
- Threaded connections: Use a threaded ball valve with PVC-compatible threads. Apply Teflon tape or a suitable thread sealant to the male threads before screwing the valve onto the pipe.
Installing a ball valve on copper pipe
- Preparation: Clean the copper pipe ends with sandpaper or a wire brush to remove oxidation and ensure a good connection.
-
Connection type: Copper pipes can use soldered or threaded connections.
- Soldered connections: Apply flux to the pipe and valve fitting, then heat with a torch and apply solder to create a watertight seal. This method requires skill and safety precautions.
- Threaded connections: Use a threaded ball valve with brass or copper threads. Apply Teflon tape or thread sealant to the male threads before connecting.
Note: Read more about installing ball valves in our ball valve installation article.
Step 8: Test the ball valve installation
Turn on the water supply and faucets previously turned off for the installation. Check for leaks in the pipes. If there are no leaks, the broken walls that contain the pipes can be closed. If the pipes leak, return to the steps and make the necessary connections.
FAQs
Can you replace a gate valve with a ball valve?
Yes, a ball valve is superior in terms of performance compared to a gate valve; hence, it is a good idea to replace a gate valve with a ball valve if needed.
Can ball valves fail?
Yes, a ball valve can fail due to a damaged seal (the valve won’t close fully) or foreign particles entering the valve (the valve gets stuck).
What is the life expectancy of a ball valve?
The average life expectancy of a ball valve is 8-10 years. Ball valves get worn out due to continuous rotation.


