


Learn How To Use A Tap and Die Set for Thread Cutting
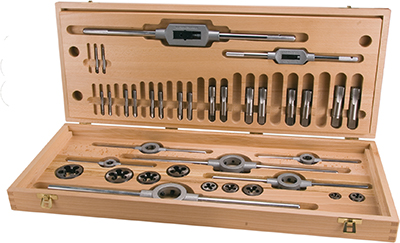
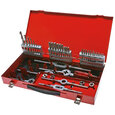
Figure 1: A complete tap and die set
Taps and dies are vital tools for creating and repairing threads on components like screws, bolts, and nuts. A tap cuts threads inside a hole, forming the female part of a threaded pair, while a die cuts threads on a rod's exterior, creating the male part. Together, they ensure secure and precise fastening in mechanical assemblies.
Table of contents
- Tap and die set
- The tap
- How to use a tap?
- The die
- How to use a die?
- Selection criteria for tap and die sets
View our online selection of thread cutting tools!
Tap and die set
A tap and die set consists of taps, dies, and drill bits of different sizes for various applications. Included in the set are handles for turning. The collection also consists of screw extractors and charts to determine the correct drill and taps to match the thread size and pitch. Some sets may contain twist-lock guides, coarse and fine taps, and other tools at a higher cost.
Taps and dies cut metal and other threads. Produced out of high-speed steel HSS or hardened carbon steel, where the former is much more robust and used for a broader range of materials. These cutting materials are suitable for threading steel, cast steel, cast iron, non-ferrous metals, plastics, softwood, and hardwood.
The tap
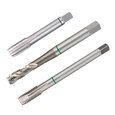
Taps thread the inside surface of a hole to create components like nuts or holes (blind or through) to screw in a screw or bolt. There are three main types of taps. The plug, second, and taper (also known as bottoming, plug, and taper in the U.S.). The image below illustrates the three types:
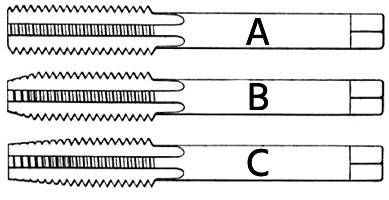
Figure 2: The three main types of taps: plug tap (A), second tap (B), and taper tap (C)
Plug tap
As seen in Figure 1, the plug tap is almost without a taper (just one tapered thread) and has a continuous cutting edge. It makes it suitable for cutting threads to the bottom of a blind hole. A plug tap cannot start the tapping process of an unthreaded hole because of the short tapered end. Other tapping types with a tapered end start the tapping process before a plug creates a continuous thread to the bottom.
Second tap
The second tap has 3 – 5 tapered threads and can therefore start the tapping process. It is the most common type of tap used. The tapered end assists in centering and aligning the tap to the hole.
Taper tap
The taper tap has 8 – 10 tapered threads. Tapping hard materials that require slow tapping or in small applications where the tap can easily break is where the taper tap works best.
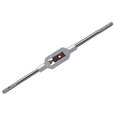
How to use a tap?
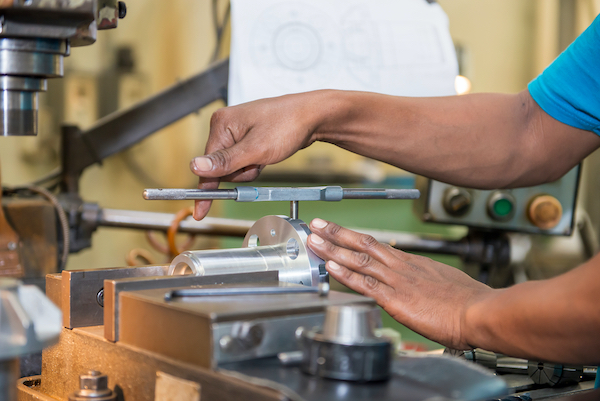
Figure 3: Creating a thread by using a tapping tool
Most tapping operations are carried out manually, but power taps are electrically driven, such as the spiral point plug tap. The tapping operation can also be machine driven by a lathe machine, a radial drilling machine, a bench-type drill machine, and similar workshop machines. We will discuss the manual operation of using a tap since it is the most common. The process of tapping involves several steps that are described below:
Prepare the hole:
- This is the first step of tapping. It is the formation of a hole, usually by drilling, to a diameter smaller than the taps outer diameter. This diameter is called the tap drill size.
- The drill bit to be used for the hole diameter is listed in the drill and tap chart, usually inside the tap and die set. It is also available in machine shops.
- Drill the hole, either a blind hole or through-hole.
- Ensure removal of all chips from the hole.
- Select tap and ratchet. Use the chart again to select the right tap size for your project. Remember, there are different types of taps. You may have to start with a tapered tap before finishing with a plug tap.
- Depending on the tap size, use the appropriate ratchet. There are typically two sizes. Using the larger ratchet for a small tap may lead to an excessive force that can break the tap.
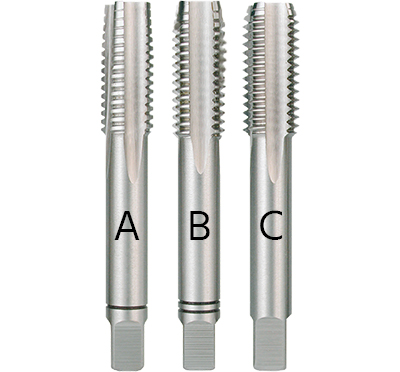
Figure 4: Taper tap: 6-8-thread chamfer (A), second tap: 4-5-thread chamfer (B), final tap (plug): 2-3-thread chamfer (C)
Create the threads (hand tap):
- Fasten down the material to be threaded with a vice or clamp.
- Insert the tap, ensure it is centered and aligned, and turn in the clockwise direction making two complete rotations. Then turn anticlockwise for half a cycle. Repeat this process until complete threading. This style of tapping prevents broken material from damaging the new threads.
- Apply cutting fluid throughout the process to reduce heat and transport chips
- Keep the material and tap centered and level.
- If you feel some restrictive force, turn anticlockwise for half a rotation and try again. Do not force the thread, or you risk breaking the tap or making incorrect threads.
- Remove the tap. Turn the ratchet anticlockwise until the tap is entirely out. The tapping process is complete.
For more information on threads, read our articles on thread design and thread standards.
The die
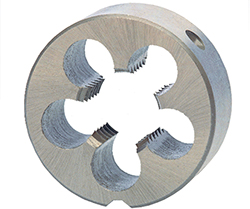
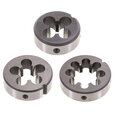
Figure 5: A solid round die
Dies can thread a cylindrical materials outside surface, such as a rod, to make a bolt or screw. There are two general types of dies: the solid die and the adjustable die. A solid die cuts a nominal thread with a consistent depth. The accuracy is dependent on die precision and wear. The compression and release of the adjustable die is possible to achieve different classes of thread fit. Turning integrated screws adjust the die.
How to use a die?
The process of threading with a die involves several steps that will be described below:
- Prepare the rod. The material diameter should be slightly smaller than the dies major diameter.The die has a chamfered side used as the entry side for the rod. The chamfer helps to center the die on the rod and reduces the start turning force when threading.
- Select die and wrench. Like the tapping process, use the chart to select the right die with an appropriately sized wrench.
- Create the threads. Fasten down the material with a vice or clamp.
- Place the die on the material with the chamfered side starting the threads. Center the die and align it, turn in the clockwise direction making two complete rotations.
- Then turn anticlockwise for half a cycle. Repeat this process until the complete threading. Use cutting fluid as required.
- Remove the die. Turn the wrench anticlockwise until the die is entirely out. The threading process is complete.
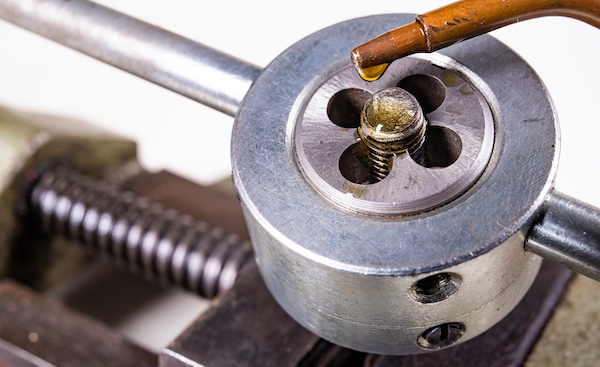
Figure 6: A solid round die
Selection criteria for tap and die sets
There are several things to consider when choosing the right tap and die set to use. Here are the important ones:
- Material: High-speed steel is more expensive than hardened carbon steel but is more robust and suitable for more material.
- The number and range of pieces: Check that the set sizes are within your desired range of needed threads to cut.
- Additional tools: Some sets come with additional tools and charts that can be useful.
- Is the part corrosion resistant?
- Check the application/material capabilities of the set listed in the manufacturers product information.
- Check that the carrying case is durable. The case stores the pieces.
Read our article on tap and die standards for more details.


