


How To Replace a Solenoid Valve Coil
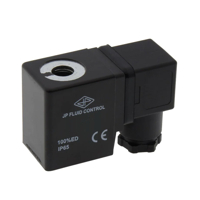
Figure 1: 24V DC solenoid valve coil
A solenoid valve coil is an important component in many fluid control systems, responsible for converting electrical energy into mechanical motion to open or close the valve. Over time, these coils can experience wear and tear or develop electrical faults, leading to malfunctions. Understanding how to replace a faulty solenoid valve coil is an essential skill that can help prevent downtime and reduce maintenance costs. By familiarizing yourself with the process, you can ensure that your systems continue to operate smoothly and efficiently, minimizing disruptions and extending the lifespan of your equipment. This article explores the various steps to replace a solenoid valve coil.
View our selection of solenoid valve coils or buy a new solenoid valve!

Solenoid valve coil failure symptoms
A solenoid valve coil may exhibit one or more failure symptoms, indicating it's time to replace it.
- Failure to open or close: If the valve fails to open or close, it could be due to a faulty solenoid coil.
- Overheating: If the coil becomes too hot to touch, it's a clear sign that it's overheating and may need to be replaced.
- Irregular operation: The coil may be at fault if the solenoid valve operates irregularly or inconsistently.
- Visible damage or burn marks: If you can see physical damage or burn marks on the coil, it likely needs to be replaced.
- Electrical testing: Using a multimeter to test the coil's rated resistance can help determine if it functions correctly. If the measured value is significantly different, the coil may need to be replaced. For example, if a coil rated at 50 ohms reads 75 ohms, it may be damaged.
Read our article on solenoid valve troubleshooting for more details on and possible causes and fixes.
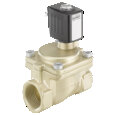
Replacing a solenoid valve coil
This section describes the steps to find a proper replacement for a solenoid valve coil.
1. Determine the coil dimensions
2. Determine the voltage and electrical power
3. Determine the connector type
1. Determine the coil dimensions
The dimensions of the original coil (diameter D and height H) should match that of the replacement coil. The replacement coil can have a small clearance in diameter. As a rule of thumb, consider a maximum tolerance of 15% of the armature diameter.
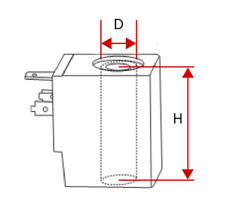
Figure 2: The diameter (D) and height (H) of the hole in the coil
2. Determine the voltage and electrical power
Voltage and signal type (AC or DC)
Determine whether the solenoid valve requires AC or DC voltage. AC is sometimes indicated with the frequency of the voltage signal in Hertz (like 50Hz or 60Hz), or the symbol '~' is used. DC is often represented by '- - -' (three dashes). Typical voltages are 230V AC, 120V AC, 24V AC, 24V DC, or 12V DC.
Electric power (watts)
The electric power of a coil (expressed in watts) is the amount of electrical energy dissipated as it is mounted on the solenoid valve and is turned on. Ensure that the replacement coil's capacity is approximately equal to, or higher than, the value of the defective coil.
The electrical power for DC voltage is given by:
P= V I
- P: Electrical power in watts (W)
- V: Voltage in volts (V)
- I: Current in Ampere (A)
For example, to calculate the current across a 12V DC coil with a power of 6 watts. I = P / V or 6/12 = 0.5 Amperes.
Note: The above equation does not apply to an AC signal as the voltage signal is in continuous sinusoidal motion. The actual power is determined with a correction factor, the power factor. In practice, the actual power will be slightly lower than Volts x Amps.
3. Determine the connector type
A solenoid valve connector is a standardized electrical connector that connects solenoid valves to their control systems (or power supply). Different types of DIN connectors are used for solenoid valves, with DIN 43650-A and B being the most common. These connectors typically come in a square or rectangular shape.
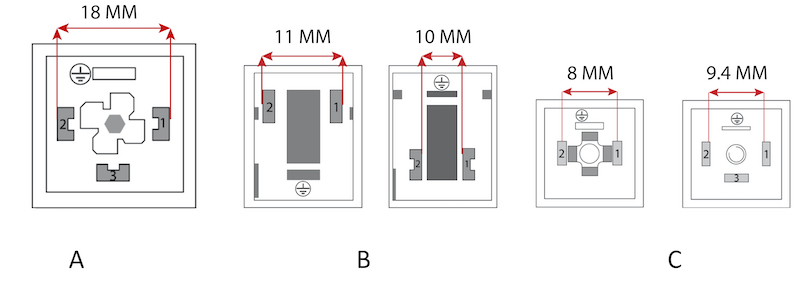
Figure 3: Diagrams of solenoid valve connectors, forms A, B, and C
4. Standards
IP degree of protection
A standard DIN connector gives the solenoid valve an IP rating of 65. This means that the solenoid valve coil is dust-tight and protected against water jets from any direction.
ATEX
ATEX is a European directive that describes requirements for devices and systems in potentially explosive atmospheres.
5. Installation
Mount the coil on the solenoid valve. Never connect the coil to the power supply when it is not mounted on the solenoid valve; else, the coil may burn out. Follow the user manual to ensure the correct assembly of the parts. Tighten the nut sufficiently to ensure the coil does not rotate or vibrate, but avoid over-tightening to prevent damage. Read our installation article for more details on installing the connector to the solenoid valve.

Figure 4: Mounting the solenoid coil: nut (A), washer (B), coil (C), and valve (D)
FAQ
How to change a solenoid coil?
Carefully open the solenoid, detach the old coil, insert the new coil, and reassemble the solenoid. Refer to the valve manual for detailed installation instructions.

