


Check Valve Leaks: Inspect, Avoid, and How to Fix
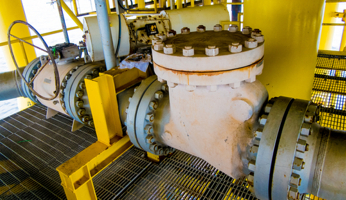
Figure 1: A large check valve with rust around its cap and body connection point, possibly indicating leakage at one point
Check valve leaks can cause system inefficiencies, performance issues, and damage. Check valves are meant to allow media to flow in one direction only. However, when the valve leaks due to a worn or damaged disc, seat, or seal, media can leak from the valve or flow in the wrong direction. Identifying and addressing a check valve leak promptly is necessary to maintain a system's efficiency and integrity.
Table of contents
- What is a check valve?
- Inspect a check valve
- How to avoid check valve leakage
- How to fix a leaking check valve
- FAQ
View our online selection of check valves!
What is a check valve?
A check valve allows media to flow through it in only one direction. This valve operates automatically without the need for an operator. The concept that explains this is cracking pressure. Every check valve has a minimum upstream pressure requirement for the valve to open and allow media to flow past it. The check valve closes when the upstream pressure drops below the cracking pressure, preventing downstream media from flowing backward. Check valves can be specified for a specific cracking pressure. Read our check valve overview article to learn more about how these valves work.
Inspect a check valve
If a check valve has noticeable leaking symptoms, inspecting the valve is the fastest method for determining that it is leaking. Therefore, if check valve leakage is possible, make inspecting the valve a top priority. Before inspecting the check valve, consult the manufacturer's product guide to determine if there are specific steps to take. The following procedure is a general method and may not apply to every check valve model.
- Safety: Conduct a sound inspection (see below) and then depressurize the system before conducting further inspections. Wear personal protective equipment (PPE) such as gloves, safety glasses, and a hard hat if necessary.
- Visual inspection: Look for signs of leakage like moisture, corrosion, and rust around the valve body and pipe connections. Be sure to have a flashlight and an inspection mirror for areas that are difficult to see.
- Touch inspection: Touch around the valve's body and pipe connections with a clean, dry cloth. If the cloth gets wet, the valve may be leaking.
- Sound inspection: If possible, listen to the check valve operating in a quiet area. Normally functioning check valves do not produce sounds. Gurgling or hissing noises can indicate a leak.
- Soap solution test: Use the soap solution test if running gas through the check valve, for example, if there's potential for an air compressor check valve to be leaking. Apply a soapy solution to the valve body and pipe connections. If bubbles form in the solution, gas is leaking.

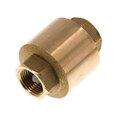
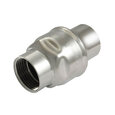
Figure 2: Regular inspection can help prevent check valve leakage
How to avoid check valve leakage
There are several methods for avoiding check valve leakage or minimizing the risk.
- Correct selection: Select the suitable check valve for the application. This means considering factors such as the valve's material compatibility with the media, pressure and temperature ratings, and the application's flow requirements. Read our chemical resistance of materials guide to assist in selecting a check valve's materials. To understand how to select flow rate, read our Kv and Cv calculator articles.
- Routine maintenance and inspection: With a routine, issues can be identified before they turn into leaks.
- Correct installation: Leaks are almost inevitable if a check valve is improperly installed. Proper installation includes ensuring that the valve is properly aligned with the pipes and in the correct position (i.e., horizontal or vertical), and the system flow direction is the same as the arrow on the valve's body. Read our check valve installation guide for more information on the installation process.
- Worn part replacement: The check valve's seat and disc can wear out over time. Replace them as needed.
- Avoid too much pressure: If the check valve is subjected to pressures higher than it's rated for, it can leak.
- Cleaning and debris removal: If debris gets trapped in the valve, its sealing surfaces can be damaged, causing leaks. Clean the valve and ensure media going through it is free from debris. For example, installing a t strainer or y strainer in front of the valve can prevent debris from clogging it.
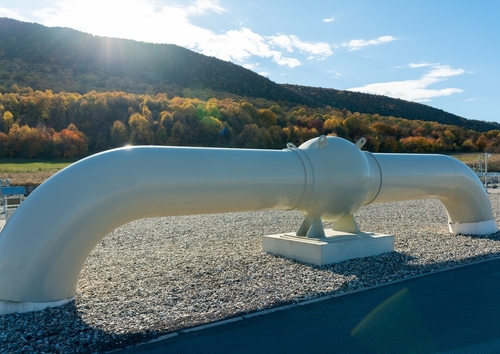
Figure 3: Check valves are found in all sorts of environments and should be selected for accordingly
How to fix a leaking check valve
Deciding whether or not to attempt to fix a leaking check valve comes down to the severity of the issue and convenience vs cost. If there is damage to the valve's body, such as severe rust or corrosion, the valve needs to be replaced. However, if damage or wear is only found on internal parts, it's possible to replace the parts rather than the entire valve. Replacing individual parts, though, can be more trouble than it's worth for relatively inexpensive valves, such as those made primarily from PVC. More expensive check valves, such as stainless steel check valves or very large check valves, can be costly to replace, making individual part replacement more desirable.
After reviewing the check valve's product guide for specific instructions, follow these steps to replace check valve components of a leaking check valve.
- Equip the proper PPE to avoid injury or exposure to hazardous materials.
- Disassemble the valve to gain access to its internal components.
- Inspect the check valve's disc, seat, spring, and any other internal components. Look for signs of wear, damage, or debris that may be causing the leak.
- Identify why the check valve is leaking. Is the problem an internal component such as a worn-out seal or damaged disc? Or is the problem more significant, such as damage to or distortion of the valve body?
- Replace any internal components that are worn out or damaged. Even if the o-rings appear to be good, take the opportunity to replace them as well.
- Fully clean any internal components that are not replaced. Clean the inside of the valve body as well.
- Reassemble and reinstall the valve.
- Test the valve by gradually introducing pressure into the system. If the repair was successful, there should be no further leaks. If there are leaks, likely the entire valve needs to be replaced.
FAQ
Should a check valve leak?
Ideally, a check valve should not leak. Leakage likely indicates an issue with the valve that will lead to issues with the system.

