


Needle Valve Installation and Maintenance
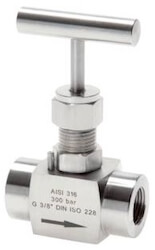
Figure 1: Stainless steel needle valve
Proper installation and maintenance of needle valves are essential to ensure reliable operation, prevent leakage, and maintain precise flow control. This article will guide you through the steps of installing a needle valve and offer tips on its maintenance. Read our needle valve overview article for more information on their details and working.
Table of contents
- How to install a threaded needle valve
- How to troubleshoot common issues in needle valves
- Needle valve maintenance
- When to replace vs repair a needle valve
- Testing, verification, and preventive maintenance
- Maintenance frequency for needle valves
- FAQs
View our online selection of needle valves!
How to install a threaded needle valve
Needle valves are typically installed in their closed position. However, check the manufacturer's guidelines for the preferred valve state during installation. Look for any markings on the valve body itself. Some valves have arrows or labels indicating "open" and "closed" directions to show the correct orientation.
-
Preparation:
- Ensure the valve is the correct type and size for the application.
- Verify the flow direction indicated by the arrow on the needle valve body.
- Verify that all pipe connections are clean and free from dirt, metal shavings, and debris.
- Examine the threads on both the valve and the connecting pipe or fitting. Ensure that they are clean, undamaged, and free of any burrs or obstructions.
-
Apply PTFE tape:
- Apply an appropriate thread sealant like PTFE tape to the male threads of the valve or the connecting pipe.
- Wrap the thread sealant around the threads in the direction of the thread spiral (Figure 2), typically 2-3 times, ensuring even coverage without excessive overlap.
-
Valve installation:
- Carefully align the valve with the connecting pipe or fitting.
- Begin threading the valve by hand.
- Use a wrench to tighten the valve an additional 1/2 to 1-1/2 turns past hand tight. Avoid over-tightening to prevent excessive stress and potential failure.
- Check for leaks: After installation, inspect the connections for leaks by slowly introducing pressure and looking for any signs of leakage. Ensure the valve operates smoothly and is securely installed.
Figure 2: If the threads angle upwards towards the right, the thread is right-handed (left). If the threads angle upwards towards the left, the thread is left-handed (right).
How to troubleshoot common issues in needle valves
Table 1: Troubleshooting needle valve issues
| Issue | Reason | Solution |
| The needle valve cannot open or close | Solid particles have built up in the valve | Disassemble the valve and remove the buildup |
Fluid is leaking past the needle valve when fully closed |
The stem or seat is worn out | Replace the stem/seal. Consider replacing the valve if the issue persists. |
| Solid particles have built up, and the valve is stuck open | Disassemble the valve and remove solids | |
| Stem hard to turn | Dried packing / rust | Clean & lubricate or replace the packing |
Fluid leaks from the valve |
The packing nut is loose | Tighten the packing nut |
| Packing is worn | Replace the packing | |
| Leaks at the connection | Improper installation | Rethread, reseal, or realign the threads |
Needle valve maintenance
While specific maintenance procedures may vary by manufacturer, the following general guidelines apply to most needle valve designs across different applications.
Preparation
- Disconnect the valve from system pressure to ensure safety.
- Allow the valve to reach ambient temperature to prevent burns or thermal stress.
- Wipe down external surfaces to remove dirt and debris, ensuring a clean work area.
How to disassemble a needle valve
- Remove handwheel/handle: Remove the handwheel or handle to access internal components.
-
Extract stem assembly:
- Unscrew the valve's packing nut.
- Remove the packing gland and stem.
- If the needle valve has a large tipped stem, remove the packing washer, gasket, and anti-extrusion ring from the stem.
- If the needle valve has a small-tipped stem, remove the packing from the valve body. The smaller tip allows for easier removal and replacement of the packing without risking damage to the stem or the packing material.
-
Access internal components:
- Remove seats: Carefully remove the seats.
- Extract springs and other components: Remove springs and other internal components for inspection.
Inspecting and cleaning a needle valve
-
Stem assembly:
- Inspection: Check for threading wear, needle tip condition, straightness, and surface finish. Look for signs of wear, scoring, or deformation.
- Cleaning: Use appropriate solvents to remove any deposits or contaminants. Focus on threaded areas and sealing surfaces, using soft brushes to avoid damage.
-
Valve body:
- Inspection: Inspect the bore condition, seat area, threads, and flow passages for scratches, corrosion, or deposits.
- Cleaning: Use solvents to clean the valve body, ensuring all contaminants are removed. Pay special attention to the seat area and threads.
-
Sealing components:
- Inspection: Examine packing, o-rings, gaskets, and seat materials for hardening, cracking, extrusion, or other damage.
- Adjusting the packing gland: Use a torque wrench to tighten the packing nut according to the manufacturer's specifications. If unavailable, tighten the nut by 1/16 turn at a time, up to 1/2 turn. Pressurize the valve to its maximum operating pressure and check for leaks. If leakage persists after several attempts, replace the packing.
- Cleaning: Clean sealing surfaces with appropriate solvents, ensuring no residue remains.
-
Final preparation:
- Blow dry all components with clean, dry air and inspect under good lighting to ensure all contaminants are removed.
When to replace vs repair a needle valve
- Indicators for repair: You can repair the valve in cases of minor seat wear, packing deterioration with a good valve body condition, and slight corrosion.
- Indicators for replacement: Replace the needle valve if the body/seat is severely damaged, corroded, and if the thread is damaged beyond acceptable limits.
Replacing individual components
- Packing: Replace the packing if the needle valve leaks. Install the new packing in the valve body or on the stem, if the valve has a large, tipped stem. Use a wrench to tighten the packing gland to the tightness specified by the valve's manufacturer.
- Seats, springs, and sealing surfaces: Replace the seals and springs if they are worn out or corroded.
-
Reassembly best practices:
- Torque requirements: Follow the manufacturer's specifications for all threaded connections and use the proper torque sequence.
- Assembly sequence: Install components in reverse order of disassembly, verifying proper orientation and smooth operation.
Testing, verification, and preventive maintenance
- Operational check: Ensure the stem moves smoothly and the valve opens and closes correctly.
- Final adjustments: Tighten the packing gland to achieve the correct compression and ensure that the stem moves freely within its designated range. Document all test results and maintenance actions.
- Preventive maintenance: Regularly inspect for external leaks, verify smooth stem operation, and monitor for changes in flow characteristics.
Maintenance frequency for needle valves
- Inspection frequency: For critical or harsh environments, inspect the needle valves every few months. In less demanding conditions, annual inspections may be sufficient.
- Packing replacement: Watch for external leakage, like fluid around the stem or packing gland. Replace the packing immediately if leakage is detected to prevent further issues.
FAQs
How to install a needle valve?
To install a threaded needle valve, clean the threads and apply a suitable thread sealant. Carefully align and hand-tighten the valve onto the pipe. Use a wrench to secure it without over-tightening.
Can a needle valve be installed backward?
Installing a needle valve backward can impair its ability to control flow effectively. Always follow the flow direction indicated by the arrow on the valve body to ensure correct installation.
Do needle valves leak?
Yes, needle valves can leak due to wear, damage, or improper installation. Common causes include deteriorated packing, worn seats, or loose connections.
How to tell if a needle valve is bad?
Signs of a bad needle valve include visible leaks, inconsistent flow control, difficulty operating the valve, and external corrosion or damage. Regular inspection can help identify these issues.

