


Mounting, Installing, and Removing Ball Bearings

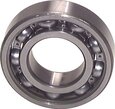
Figure 1: Ball bearings enhance the efficiency of machines with rotating components.
Ball bearings are integral to most machines that experience axial or radial rotational force. However, ball bearings will wear down over time like any friction component. They must be replaced to protect the overall machine. With the correct tools and understanding, ball bearing installation is straightforward. This article provides the information necessary to begin and accomplish the job.
View our online selection of ball bearings!

When to replace a ball bearing
A ball bearing needs to be replaced when it reaches its service life. However, the bearing may begin to fail before it reaches the end of its service life. Symptoms of a failing ball bearing are:
- Noise: Unusual or excessive noise is often the first sign of a bearing problem. This can be a grinding, whining, or rattling noise.
- Vibration: Excessive vibration can indicate a damaged or worn-out bearing. If the vibration increases over time, it's a clear sign that the bearing is failing.
- Heat: Ball bearings should not produce excessive heat. It's a clear sign they're worn out or damaged if they do.
- Visual inspection: If there is visible damage, such as cracks, corrosion, or wear, it's time to replace the bearing.
- Performance: If the equipment or machinery the bearing is installed in starts performing poorly or inefficiently, the bearing might need replacement.
How to remove a ball bearing
The following steps explain how to remove a ball bearing from a machine:
- Equipment preparation: Gather all necessary tools for the process. At a minimum, there needs to be personal protective equipment (PPE), a bearing puller, and the tools required to adjust the puller (e.g., a wrench).
- Safety measures: Ensure the machine is completely shut off and cannot be turned on during removal.
- Bearing inspection: Visually inspect the bearing. If seated with a retaining ring, use a screwdriver to remove it carefully. Be cautious not to damage the ring or housing.
- Bearing removal: Attach the bearing puller to the bearing. Depending on access, the puller's jaws should grip the outer or inner race. For further instructions, read our how to use a bearing puller guide.
- Bearing inspection post-removal: After removing the bearing, inspect the housing and shaft for any wear, corrosion, or damage.
- Clean up: Clean the area where the bearing was seated, removing dirt or debris. This will ensure the new bearing can be installed smoothly and won't be compromised by leftover debris.
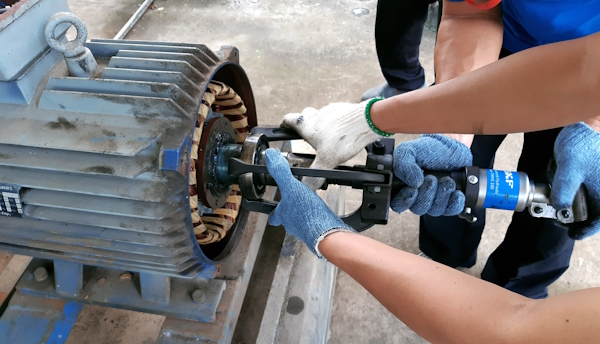
Figure 2: Removing a bearing with a bearing puller
Mounting & installing a ball bearing
There are several methods for mounting a ball bearing to a shaft or other system component, depending on the needs of the job. However, before beginning any mounting process, remember a few important details.
- Keep bearing in packaging: Do not remove a bearing from its packaging until the moment it is ready to be mounted to the shaft. This mitigates the amount of dirt and other foreign material that can stick to the bearing before it is installed.
- Use proper safety equipment: If working with lubrication or heat, prepare the proper equipment, such as safety glasses and high-temperature resistant gloves.
- Check shaft and housing: Check the shaft and housing to ensure it is free of dirt, burrs, and other impurities that can compromise the bearing installation. If necessary, use an emery cloth to clean each component. Finally, once again measure the shaft and housing to ensure that the bearing to be mounted is the correct size. Figure 3 shows where to take measurements on the shaft (Figure 3 left) and housing (Figure 3 right).
- Bearing lubrication: It's common for bearings to come pre-lubricated from the manufacturer. If this is not the case, use grease or oil to lubricate the bearing before installation. In this case, do not heat the bearing during the installation process.
- Check the bearing: After installation, turn the bearing by hand. It should move freely without any resistance.
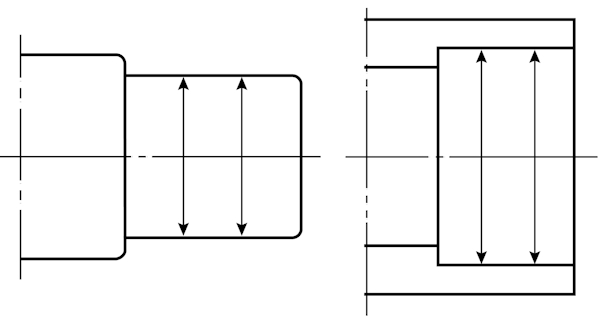
Figure 3: The double arrows indicate where to take measurements on the shaft (left) and housing (right) before bearing installation.
Mounting a press fit bearing
A press fit ball bearing, also known as an interference fit, has a bore that is slightly smaller than the shaft it installs onto. This provides a very tight fit between the bearing and shaft. General applications that have a rotating shaft should have a press fit connection with the bearing's inner ring. If the outer ring also rotates, then it too should have a press fit connection with the housing around the bearing.
After pushing the bearing onto the shaft, a mounting fixture is used to further push the bearing into position. A mounting fixture is designed to contact only the bearing's inner ring or only its outer ring. Ideally, a hydraulic press with a mounting fixture should be used to slowly push the bearing into position. However, if this is not available, using a bearing drift (a hollow tube that fits the bearing's inner or outer ring) and a rubber mallet can be used to position the bearing.
In typical applications, the ball bearing is positioned up against a shoulder, which is a stepped increase in the shaft's diameter. This stops the bearing from moving further down the shaft. Then, another shoulder can be positioned in front of the bearing to prevent movement towards the end of the shaft. Shoulders typically come in the form of snap rings or lock nuts.
- Snap ring: A snap ring, also known as a retaining ring, is a fastener that holds components or assemblies onto a shaft or in a housing/bore when installed in a groove. It provides a shoulder that retains the specific component or assembly.
- Lock nut: A lock nut, on the other hand, is a type of nut that resists loosening under vibrations and torque. It is used on a threaded shaft and tightened against the bearing to hold it securely in place. Unlike the snap ring, the lock nut can apply a clamping force and doesn't require a groove on the shaft.
Clearance and transition fits
A clearance fit is where the shaft's diameter is smaller than the bearing's bore diameter, or the housing's diameter is larger than the bearing's outer diameter. This results in a gap or "clearance" between the two mating parts. The clearance can range from a small amount (a "tight" clearance fit) to a larger amount (a "loose" clearance fit). The purpose of clearance fits in bearings is to facilitate relative motion between components and reduce friction, heat, and wear.
Transition fits, on the other hand, are a category of fits that can either provide a small clearance or a slight interference. This type of fit is designed to allow or restrict relative motion between two mating parts, depending on the specific requirements of the assembly. The actual fit can vary based on manufacturing tolerances. Transition fits are typically used in applications where accuracy is important, but there is also a need for either some degree of freedom or constraint between parts.
Mounted bearings
A mounted bearing comes in a cast iron or plastic housing that can readily mount to a machine around a shaft. This makes the mounting process easier because the housing is already constructed. The most common type of mounted bearing is a pillow block (Figure 4).
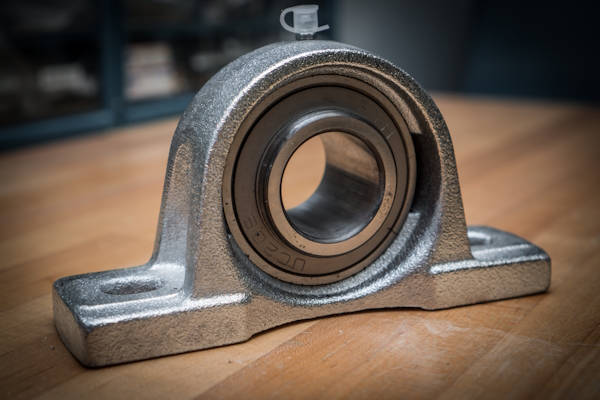
Figure 4: A pillow block mounted bearing
Mounted bearings are designed for a slip fit, or clearance fit. This means the bearing bore is large enough for the bearing to easily slide onto the shaft. Then, depending on the mounted bearing's specific design, the bearing can be tightened to the shaft in one of the following ways:
- Set screw: Once positioned, set screws in the housing around the bearing are tightened, tightening the bearing to the shaft. Retighten the screws after 24 hours of operation using this mounting style.
- Eccentric collar: The bearing and collar have matching eccentrics. This means the collar can fit around the bearing and be rotated to tighten around the bearing. Then, a drift is inserted into a blind hole in the collar and lightly hammered in the direction of bearing rotation. This tightens the bearing to the shaft. This design also uses set screws.
- Concentric locking collar: A concentric locking collar's inner ring has tangs, or projecting edges, that clamp down on the bearing when the collar is tightened. When the collar is tightened to the bearing, it tightens to the bearing concentrically to the shaft.
- Tapered adapter: A tapered adapter fits through the bearing's inner ring. A locking washer and nut tighten the adapter, providing a tight and uniform clamping to the shaft.
FAQs
What is bearing mounting?
Bearing mounting involves fitting a bearing onto a shaft and into the bearing housing.
What holds a bearing in place?
A pin positioned against the outer diameter of the inner ring holds the bearing in place from the end side. From the interior, a collar presses against the inner ring's outer diameter.


