


Learn How to Test a Battery Using a Multimeter
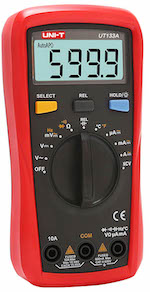
Figure 1: Multimeter
Testing a battery with a multimeter is essential to ensure its optimal performance and longevity. Whether troubleshooting electronic devices or diagnosing car ignition issues, a multimeter can accurately measure a battery's voltage and current. This guide outlines the steps to identify faulty batteries and ensure they are functioning correctly. Understanding these techniques helps prevent unexpected failures and maintain the reliability of devices and vehicles.
When to check a battery
It's important to test a battery for faults if one notices any of the following symptoms:
- Physical issues: Look for signs of leaking, overheating, broken terminals, or bulging.
- Inability to hold charge: If the battery can't maintain its charge, it may be faulty.
- Rapid charge and quick drain: If the battery charges to 100% very quickly but then drains just as fast, it could be a sign of a problem.
In case of any of the above symptoms, measuring the voltage across the battery terminals can identify whether or not the battery is truly faulty. If it is significantly lower than the rated voltage indicated on the battery label, the battery may need to be replaced.
View our online selection of clamp meters and multimeters!

How to check battery voltage using a multimeter
- Disconnect the battery from the circuit.
- Rotate the knob of the multimeter and set it to 15-20V DC voltage (a battery generates DC power). Always set the dial to a higher range than the specified voltage of the battery. For a 9V battery, selecting the 15-20V range on the multimeter dial should work fine.
- Connect the plug of the red probe to the VΩmA port of the multimeter, and the black probe to the COM port.
- Connect the multimeter to the battery’s terminals (red probe to the battery’s positive terminal and black probe to the battery’s negative terminal).
- Take the reading on the multimeter. If the reading shows a value greater than 7V for a 9V battery, the battery is still fit to use.
- If the reading shows a considerably low value (say <1V for a 9V battery), the battery may be faulty or dead and needs to be replaced. The battery is typically considered dead if the multimeter reads below half the voltage level specified on the battery. It's important to note that Lithium-ion batteries have a limited number of charge cycles and can become damaged if discharged below a certain voltage. It is recommended to consult the manufacturer's specifications before performing a multimeter test on lithium batteries.
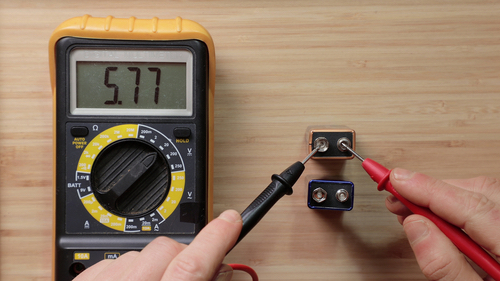
Figure 2: Testing a battery using a multimeter
How to check battery current using a multimeter
To accurately measure the instantaneous current output of a battery using a multimeter, follow these steps:
- Prepare the battery and multimeter: Ensure the battery is disconnected from any circuit. This is to prevent any external circuitry from affecting the measurement.
- Set up the multimeter: Set the multimeter to measure DC current. Choose the appropriate range based on the expected current draw. For instance, if anticipating a small current draw from a small battery, setting the multimeter to the 200mA range might be advisable.
- Connect the multimeter probes correctly: Connect the red probe to the port on the multimeter designated for current measurement. This port is often labeled "A" for amperes or "mA" for milliamperes, depending on the expected current magnitude. If the multimeter has separate ports for different current ranges (e.g., mA, A), ensure to select the correct one. Connect the black probe to the common (COM) port on the multimeter.
-
Measure the current:
- To measure the current, one must create a circuit where the multimeter is in series with the battery and a load. A resistor has a fixed resistance (assuming temperature remains constant), so the current drawn can be easily calculated using Ohm's Law. For example, a 5V battery connected to a 10-ohm resistor would draw 0.5 amperes (A) of current (I = V/R = 5V/10Ω = 0.5A).
- Connect one multimeter probe (either red or black) to one of the battery terminals. Then, connect the other probe to one end of a load (e.g., a resistor, bulb, or the device intended to be powered by the battery). Finally, ensure the other end of the load is connected back to the remaining battery terminal, completing the circuit.
- With the multimeter correctly integrated into the circuit, turn on the battery power (if there's an on/off switch) or complete the circuit connection. The multimeter will now measure the current flowing from the battery through the load, displaying the value in amperes (A) or milliamperes (mA).
The reading on the multimeter indicates the instantaneous current being drawn from the battery by the connected load at that moment. This measurement reflects the battery's ability to supply current under the specific conditions of the test, not its total capacity (Ah or mAh). A battery's capacity rating (e.g., 100mAh) indicates how much charge it can deliver over time, not the instantaneous current measured in this test. If the measured current aligns with the expected value for the load, the battery is likely in good condition. However, this does not directly indicate the battery's total charge capacity.
How to test a car battery with a multimeter
Car batteries are one of the most commonly checked batteries. Like any battery, a car battery can often go bad over time or fail suddenly. Even though it is more likely to happen during extreme weather, it is always a good idea to check the car battery under normal conditions too. An automotive battery measures 12.6 V or above when fully charged. When the engine is running, the value on the multimeter is typically between 13.7 and 14.7 V.
To check if a car battery has gone bad, look out for the following symptoms:
- Horn sounds muted
- The brightness of the lights decreases while using the horn or indicators
- The dashboard battery light illuminates
- The car has a lot of false starts
- The vehicle requires a lot of jump-starts (connecting an external power source temporarily)
- The battery has acid spillage leading to corrosion in surrounding areas
- The car doesn’t start
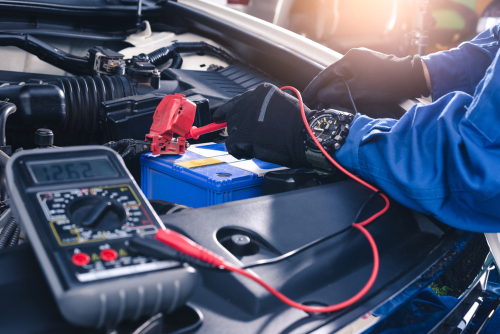
Figure 3: Checking a car battery with a multimeter
How to check the voltage across a car battery using a multimeter
A car battery is usually located in the engine compartment towards one side of the engine, but can also be placed under the wheel well, the back end of the car, or even in the trunk. Refer to the owner’s manual in case of any confusion regarding the battery location. Also, access the battery terminals by looking for metal connections on the top or front of the battery. Perform the following steps sequentially to check the voltage across the car battery when the car is off:
- Turn on the headlights for 2-3 minutes to eliminate any surface charge on the battery.
- Turn off the lights.
- Set the multimeter dial to 15-20V (DC voltage).
- Connect the plug of the red probe to the VΩmA port of the multimeter and the black probe to the COM port.
- Connect the multimeter leads to the battery’s terminals (red probe to the battery’s positive terminal and black probe to the battery’s negative terminal).
- Take the reading on the multimeter.
If the car is off, a reading of 12.2 V-12.6 V shows that the battery is in good condition and fully charged, and if the measured voltage is less than 12.2 V, the battery is weak and may have to be replaced.
When the vehicle is turned on, the battery drives the starter motor, so more power is drawn from the battery. The voltage rating drops for a moment as soon as the car is turned on, but it shouldn't get below 10 V. If the measured voltage is below 10 V, the battery may not have sufficient turnover strength and may be prone to failure soon, hence may be either recharged or replaced.
Another way to check a car battery is by ensuring that it draws power successfully by testing its cold cranking amps (CCA). CCA rating gives an estimation of how efficiently the battery powers an engine at cold temperatures (typically anything below 32 °F or 0 °C).
How to test the cold cranking amps of a car battery
- Connect the multimeter to the car battery terminals.
- Set the multimeter dial to 15-20V (DC voltage).
- Fire up the ignition of the car. Keep the engine running throughout the measurement process.
- The reading may drop initially (say to 10V) and then return to a higher value around 12V.
- A constant reading after the initial drop indicates a perfect battery.
- An initial reading greater than or equal to 5V and less than 10V suggests that the battery is slowly dying.
- If the reading is below 5V, it is better to replace the battery.
Note: Get another person's help while testing the CCA of a car battery. One can control the car ignition process while the other takes the measurement.
To learn more about multimeters, read our multimeter guide. Also, learn how to test a capacitor using a multimeter in our technical article.
FAQ
What should a 12V battery read on a multimeter?
When fully charged, a 12V battery should read slightly above 12V, for example 12.6V.

